ARC596 - Tutorial 4 - Multiple Houses
ARC596 - Tutorial 4 - Multiple Houses
- ARC596: Embodied Computation
- Professor: Daniela Mitterberger - mitterberger@princeton.edu
- Assistant Instructor: Kirill Volchinskiy - kvolchinskiy@princeton.edu
Requirements
- Rhinoceros 7
- Github Desktop
- Anaconda
- Unity 2022.3.3f1
*Note: Android SDK and Java JDK (when developing for Android) - have to be ticked in the installation modules when installing Unity.*
Dependencies
Create the Multiple Houses App
Useful Links
→ More Information on execution order of events in unity
→ More information about AR Foundation
Scenes: https://docs.unity3d.com/Manual/CreatingScenes.html
Game Objects: https://docs.unity3d.com/ScriptReference/GameObject.html
Prefabs: https://docs.unity3d.com/Manual/Prefabs.html
Packages: https://docs.unity3d.com/Manual/PackagesList.html
Unity Interface
Hierarchy Window
Project Window
Scene View
Game View
Inspector Window
Console
C# in Unity:
Variables hold values and references to objects (you can see objects as “bigger” variables). They’re like a box that holds something for us to use. Variables start with a lowercase letter. When Unity compiles the script, it makes public variables visible in the editor.
Functions are collections of code that compare and manipulate these variables. Functions start with an uppercase letter. We organize code in functions so that they can be easily reused multiple times in different parts of the program.
Classes are a way to structure code to wrap collections of variables and functions together to create a template that defines the properties of an object.
Scripting is primarily comparing these objects and their current states and values. It’s based on logic determining an outcome or resolution.
Functions
Scripts manipulate the variables by using functions. There are a number of functions that run automatically inside Unity.
Start like Awake, Start will be called if a GameObject is active, but only if the component is enabled. For more information on the differences with Awake, see this video.
Update is called once per frame. This is where you put code to define the logic that runs continuously, like animations, AI, and other parts of the game that must be constantly updated.
Overview of the code
-
The structure of the code is divided into the following sections:
-
Libraries that are used
-
Short informative description (summary)
-
Public: Variables that can be changed outside of the script
-
Private: Variables that can only be changed inside of the script
-
Void Start () Runs once, when the app starts to run
-
Void Update() Runs on every frame
-
Instantiate Multiple
Tutorial
We check the different types of touch on the screen.
- TouchPhase.Began = When a touch has first been detected, the first moment the finger touches the screen (happens once in a touch phase)
- TouchPhase.Moved = When the touch is a moving touch (happens continuously, detected on every update frame)
- TouchPhase.Ended = When we lift up the finger from the screen (happens once)
Let’s write the following code:
	private void HandleTouch(Touch touch)
    {

            // Handle finger movements based on TouchPhase
            switch (touch.phase)
            {
                case TouchPhase.Began:
                    InstantiateOnTouch(touch);
                    break; //break: If this case is true, it will not check the other ones. More computational efficiency,

                case TouchPhase.Moved:
                    if (instantiatedObject != null)
                    {
                        if (Input.touchCount == 1)
                        {
                            Rotate(instantiatedObject, touch);
                        }

                        else if (Input.touchCount == 2)
                        {
                            PinchtoZoom(instantiatedObject);
                        }
                    }

                    break;

                case TouchPhase.Ended:
                    Debug.Log("Touch Phase Ended.");
                    break;
            }
    }
Note: For code efficiency, we check different cases and “break” the code when one is detected.
Let’s check the InstantiateOnTouch void from yesterday and see what happens if we put mode==1 instead of O
 private void InstantiateOnTouch(Touch touch)
    {

            Debug.Log("Single Touch");

            // Check if the raycast hit any trackables.
            if (rayManager.Raycast(touch.position, hits, TrackableType.PlaneWithinPolygon))
            {
                // Raycast hits are sorted by distance, so the first hit means the closest.
                var hitPose = hits[0].pose;

                //mode 0: single placement of objects, like the 3D printed house hologram
                //mode 1: multiple placement of objects, like multiple trees or characters
                bool shouldInstantiateNewObject = mode == 1 || (mode == 0 && instantiatedObject == null);
                bool prefabChanged = lastUsedPrefab != selectedPrefab && mode == 0;

                if (shouldInstantiateNewObject || prefabChanged)
                {
                    if (prefabChanged && instantiatedObject != null)
                    {
                        Destroy(instantiatedObject); // Optionally destroy the old object if a new prefab is selected
                        Debug.Log("Prefab changed, instantiating new prefab.");
                    }

                    instantiatedObject = Instantiate(selectedPrefab, hitPose.position, hitPose.rotation, GetParentTransform());
                    lastUsedPrefab = selectedPrefab;
                }
                else
                {
                    // Move the existing instantiated object
                    instantiatedObject.transform.position = hitPose.position;
                    instantiatedObject.transform.rotation = hitPose.rotation;
                }
                AdjustRotationToCamera(instantiatedObject);
        }

    }
Script for rotation of instantiated Objects
    private void Rotate(GameObject objectToRotate, Touch touch)
    {
        float rotationSpeed = 0.1f; // Adjust rotation speed as needed
        objectToRotate.transform.Rotate(Vector3.up, touch.deltaPosition.x * rotationSpeed, Space.World);
    }
Change mode variable to public and try mode==1
public int mode = 1; //int = integer number (without decimals)
→ Build the App to instantiate multiple objects!
Unity UI
Unity UI is a UI toolkit for developing user interfaces for games and applications. It is a GameObject-based UI system that uses Components and the Game View to arrange, position, and style user interfaces. Documentation here
Canvas
The Canvas is the area that all UI elements should be inside. The Canvas is a Game Object with a Canvas component on it, and all UI elements must be children of such a Canvas.
Creating a new UI element, such as an Image using the menu GameObject > UI > Image, automatically creates a Canvas, if there isn’t already a Canvas in the scene. The UI element is created as a child to this Canvas.
The Canvas area is shown as a rectangle in the Scene View. This makes it easy to position UI elements without needing to have the Game View visible at all times.
Canvas uses the EventSystem object to help the Messaging System.
Basic Layout
In this section we’ll look at how you can position UI elements relative to the Canvas and each other. If you want to test yourself while reading, you can create an Image using the menu GameObject -> UI -> Image.
Rect Transform
The Rect Transform is a new transform component that is used for all UI elements instead of the regular Transform component.
Rect Transforms have position, rotation, and scale just like regular Transforms, but it also has a width and height, used to specify the dimensions of the rectangle.
Resizing Versus Scaling
When the Rect Tool is used to change the size of an object, normally for Sprites in the 2D system and for 3D objects it will change the local scale of the object. However, when it’s used on an object with a Rect Transform on it, it will instead change the width and the height, keeping the local scale unchanged. This resizing will not affect font sizes, border on sliced images, and so on.
Anchor presets
In the Inspector, the Anchor Preset button can be found in the upper left corner of the Rect Transform component. Clicking the button brings up the Anchor Presets dropdown. From here you can quickly select from some of the most common anchoring options. You can anchor the UI element to the sides or middle of the parent, or stretch together with the parent size. The horizontal and vertical anchoring is independent.
The Anchor Presets buttons displays the currently selected preset option if there is one. If the anchors on either the horizontal or vertical axis are set to different positions than any of the presets, the custom options are shown.
Anchor and position fields in the Inspector
You can click the Anchors expansion arrow to reveal the anchor number fields if they are not already visible. Anchor Min corresponds to the lower left anchor handle in the Scene View, and Anchor Max corresponds to the upper right handle.
The position fields of the rectangle are shown differently depending on whether the anchors are together (which produces a fixed width and height) or separated (which causes the rectangle to stretch together with the parent rectangle).
Button
A Button has an OnClick UnityEvent to define what it will do when clicked.
See the [Button](https://docs.unity3d.com/Packages/com.unity.ugui@1.0/manual/script-Button.html) page for details on using the Button component.
Slider
A Slider has a decimal number Value that the user can drag between a minimum and maximum value. It can be either horizontal or vertical. It also has a OnValueChanged UnityEvent to define what it will do when the value is changed.
Event System
The Event System is a way of sending events to objects in the application based on input, be it keyboard, mouse, touch, or custom input. The Event System consists of a few components that work together to send events.
When you add an Event System component to a GameObject you will notice that it does not have much functionality exposed, this is because the Event System itself is designed as a manager and facilitator of communication between Event System modules.
The primary roles of the Event System are as follows:
- Manage which GameObject is considered selected
- Manage which Input Module is in use
- Manage Raycasting (if required)
- Updating all Input Modules as required
Raycasters
Raycasters are used for figuring out what the pointer is over. It is common for Input Modules to use the Raycasters configured in the Scene to calculate what the pointing device is over. The Raycasters that we will be using for our App are:
AR Raycast Manager
Also known as hit testing, ray casting allows you to determine where a ray (defined by an origin and direction) intersects with a trackable. A “trackable” is a feature in the physical environment that can be detected and tracked by an XR device.
Example:
[SerializeField]
ARRaycastManager m_RaycastManager;

List < ARRaycastHit > m_Hits = new List < ARRaycastHit > ();

void Update() {

  if (Input.touchCount == 0)
    return;

  if (m_RaycastManager.Raycast(Input.GetTouch(0).position, m_Hits)) {
    // Only returns true if there is at least one hit
  }

}
Physics Raycaster
Used for 3D physics elements. Casts a ray against all colliders in the Scene and returns detailed information on what was hit. This example reports the distance between the current object and the reported Collider:
Example:
public class RaycastExample: MonoBehaviour {
  void FixedUpdate() {

    RaycastHit hit;

    if (Physics.Raycast(transform.position, -Vector3.up, out hit)){

		print("Found an object - distance: " + hit.distance);

	}

  }
}
User interface:
We first will take a look at our canvas options. Currently we have 4 menus and one reset button.
For each we can insert different GameObjects to place multiple instants.
Change the GameObjects to initiate:
Click on the main Menu button such as Menu_Button_Trees. You will see it highlighted in the scene
In the inspector you find the object manager and the 3 specific prefabs
We can just drag and drop another GameObject onto the prefab tab
Change the Logo in the Menu:
First, we need to upload a new Logo in the asset folder logo. Ideally a .png with no background.
Then we click on the new logo and in the Inspector switch the Texture type to “Sprite (2D and UI)
Then we click on image in the desired menu area
In the inspector we drag our newly created logo onto the source image. We should tick preserve aspect and might need to adjust position and scale
How to personalize the button:
We can adjust the color of the button, once pressed, selected, or disabled.
Now we all should personalize the buttons and link our own prefabs with it!
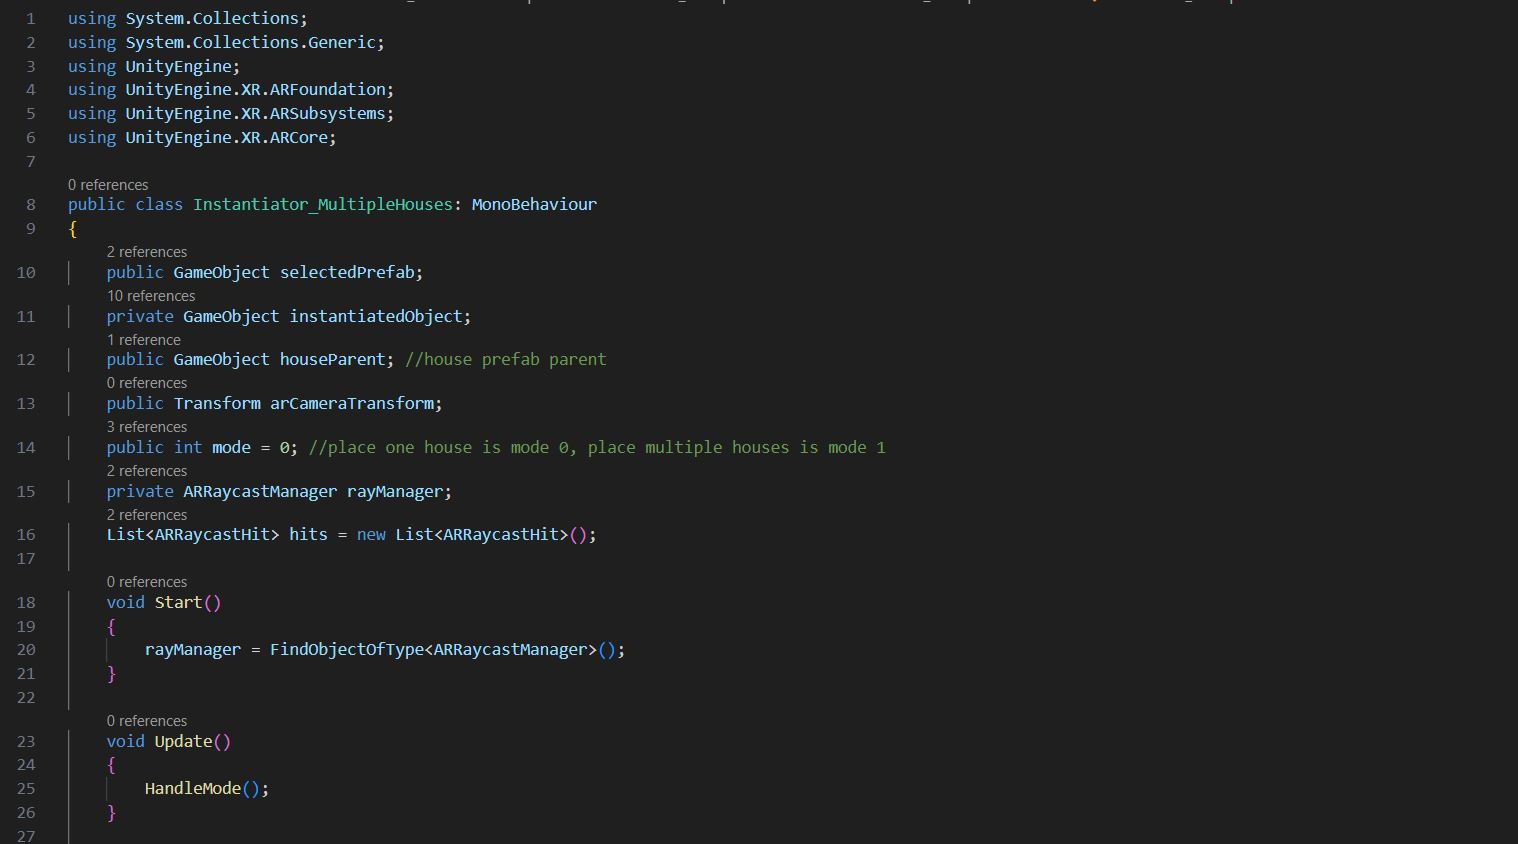
After this let’s look at the code and try to understand the logic of it:
using System.Collections;
using System.Collections.Generic;
using UnityEngine;
using UnityEngine.XR.ARFoundation;
using UnityEngine.XR.ARSubsystems;
using UnityEngine.XR.ARCore;
using UnityEngine.EventSystems;

public class Instantiator_MultipleHouses: MonoBehaviour
{
    public GameObject selectedPrefab;
    private GameObject instantiatedObject;
    public GameObject singleObjectParent; //house prefab parent
    public GameObject multipleObjectParent; //all other objects prefab parent
    public int mode = 0; //place one house is mode 0, place multiple houses is mode 1
    private GameObject lastUsedPrefab; // Add this to track the last used prefab

    //raycast related variables here
    private ARRaycastManager rayManager;
    private ARSession arSession;
    List<ARRaycastHit> hits = new List<ARRaycastHit>();

    void Start()
    {
        rayManager = FindObjectOfType<ARRaycastManager>();
        arSession = FindObjectOfType<ARSession>();
    }

    void Update()
    {
        if (Input.touchCount > 0 && !IsPointerOverUIObject(Input.GetTouch(0).position))
        {
            HandleTouch(Input.GetTouch(0));
        }
    }

    private void HandleTouch(Touch touch)
    {

            // Handle finger movements based on TouchPhase
            switch (touch.phase)
            {
                case TouchPhase.Began:
                    InstantiateOnTouch(touch);
                    break; //break: If this case is true, it will not check the other ones. More computational efficiency,

                case TouchPhase.Moved:
                    if (instantiatedObject != null)
                    {
                        if (Input.touchCount == 1)
                        {
                            Rotate(instantiatedObject, touch);
                        }

                        else if (Input.touchCount == 2)
                        {
                            PinchtoZoom(instantiatedObject);
                        }
                    }

                    break;

                case TouchPhase.Ended:
                    Debug.Log("Touch Phase Ended.");
                    break;
            }
    }


    private void InstantiateOnTouch(Touch touch)
    {

            Debug.Log("Single Touch");

            // Check if the raycast hit any trackables.
            if (rayManager.Raycast(touch.position, hits, TrackableType.PlaneWithinPolygon))
            {
                // Raycast hits are sorted by distance, so the first hit means the closest.
                var hitPose = hits[0].pose;

                //mode 0: single placement of objects, like the 3D printed house hologram
                //mode 1: multiple placement of objects, like multiple trees or characters
                bool shouldInstantiateNewObject = mode == 1 || (mode == 0 && instantiatedObject == null);
                bool prefabChanged = lastUsedPrefab != selectedPrefab && mode == 0;

                if (shouldInstantiateNewObject || prefabChanged)
                {
                    if (prefabChanged && instantiatedObject != null)
                    {
                        Destroy(instantiatedObject); // Optionally destroy the old object if a new prefab is selected
                        Debug.Log("Prefab changed, instantiating new prefab.");
                    }

                    instantiatedObject = Instantiate(selectedPrefab, hitPose.position, hitPose.rotation, GetParentTransform());
                    lastUsedPrefab = selectedPrefab;
                }
                else
                {
                    // Move the existing instantiated object
                    instantiatedObject.transform.position = hitPose.position;
                    instantiatedObject.transform.rotation = hitPose.rotation;
                }
                AdjustRotationToCamera(instantiatedObject);
        }

    }


    private Transform GetParentTransform()
    {
        return mode == 0 ? singleObjectParent.transform : multipleObjectParent.transform;
    }

    private void AdjustRotationToCamera(GameObject obj)
    {
        Vector3 cameraPosition = Camera.main.transform.position;
        Vector3 direction = new Vector3(cameraPosition.x, obj.transform.position.y, cameraPosition.z) - obj.transform.position;
        obj.transform.rotation = Quaternion.LookRotation(direction);
    }

    private void Rotate(GameObject objectToRotate, Touch touch)
    {
        float rotationSpeed = 0.1f; // Adjust rotation speed as needed
        objectToRotate.transform.Rotate(Vector3.up, touch.deltaPosition.x * rotationSpeed, Space.World);
    }

    private void PinchtoZoom(GameObject objectToZoom)

    //scale using pinch involves 2 touches
    // we count both the touches, store them and measure the distance between pinch
    // and scale depending on the pinch distance
    {
        if (Input.touchCount == 2)
        {
            Debug.Log("Double Touch");
            var touchZero = Input.GetTouch(0);
            var touchOne = Input.GetTouch(1);

            // Find the position in the previous frame of each touch.
            Vector2 touchZeroPrevPos = touchZero.position - touchZero.deltaPosition;
            Vector2 touchOnePrevPos = touchOne.position - touchOne.deltaPosition;

            // Find the magnitude of the vector (the distance) between the touches in each frame.
            float prevTouchDeltaMag = (touchZeroPrevPos - touchOnePrevPos).magnitude;
            float touchDeltaMag = (touchZero.position - touchOne.position).magnitude;

            // Find the difference in the distances between each frame.
            float deltaMagnitudeDiff = prevTouchDeltaMag - touchDeltaMag;
            float pinchAmount = deltaMagnitudeDiff * -0.02f * Time.deltaTime;

            Debug.Log("Scaling Initialized");
            Debug.Log(objectToZoom);
            //scale according to pinch amount
            objectToZoom.transform.localScale += new Vector3(pinchAmount, pinchAmount, pinchAmount);
        }
    }


    //   UI Functions
    public void SetMode_A()
    {
        mode = 0; // for single placement of objects, like the 3D printed house hologram
    }
    public void SetMode_B()
    {
        mode = 1; // for multiple placement of objects, like multiple trees or characters
    }


    public static bool IsPointerOverUIObject(Vector2 touchPosition)
    {
        PointerEventData eventDataCurrentPosition = new PointerEventData(EventSystem.current) { position = touchPosition };
        List<RaycastResult> results = new List<RaycastResult>();
        EventSystem.current.RaycastAll(eventDataCurrentPosition, results);
        return results.Count > 0;
    }

    public void ResetApp()
    {
        //destroy all created objects
        if (singleObjectParent.transform.childCount > 0 || multipleObjectParent.transform.childCount > 0)
        {
            foreach (Transform child in singleObjectParent.transform)
            {
                GameObject.Destroy(child.gameObject);
            }
            foreach (Transform child in multipleObjectParent.transform)
            {
                GameObject.Destroy(child.gameObject);
            }
        }

        //reset AR session : resets all trackable objects and planes.
        arSession = FindObjectOfType<ARSession>();
        arSession.Reset();
    }

}
After this let’s look at the instantiator code. The buttons are linked to different modes. These modes are linked to different actions.
	// UI Functions
	public void SetMode_A() {
	mode = 0; // for single placement of objects, like the 3D printed house hologram
	}
	public void SetMode_B() {
	mode = 1; // for multiple placement of objects, like multiple trees or characters
	}
These modes are linked with if statements such as place one instance or multiple:
	//mode 0: single placement of objects, like the 3D printed house hologram
	//mode 1: multiple placement of objects, like multiple trees or characters
	bool shouldInstantiateNewObject = mode == 1 || (mode == 0 && instantiatedObject == null);
	bool prefabChanged = lastUsedPrefab != selectedPrefab && mode == 0;

	if (shouldInstantiateNewObject || prefabChanged)
	{
		if (prefabChanged && instantiatedObject != null)
		{
			Destroy(instantiatedObject); // Optionally destroy the old object if a new prefab is selected
			Debug.Log("Prefab changed, instantiating new prefab.");
		}

		instantiatedObject = Instantiate(selectedPrefab, hitPose.position, hitPose.rotation, GetParentTransform());
		lastUsedPrefab = selectedPrefab;
	}
	else
	{
		// Move the existing instantiated object
		instantiatedObject.transform.position = hitPose.position;
		instantiatedObject.transform.rotation = hitPose.rotation;
	}
- In the unity file you need to link the modes with the buttons:
-
This works because the void is set to public and the on click is linked with the instantiator script. The button has therefore access to the public void SetMode_B() which sets the mode to 1.
-
The instantiator script looks every frame for touch input (as it is in input) and looks for the mode. Depending on the mode and the touch input a different action is activated.